MQTT and RaspberryPi
Prerequisites
- SSH Client:
- SSH from CLI (Linux and MacOS)
- Putty (Windows)
- Termius (cross-platform) <– Recommended 😉
- Text Editor:
- Visual Studio Code <– It’s open-source, ok? 😒
- SFTP Extension for VS Code
What is our workshop about
This workshop is about applying MQTT protocol to turn ON/OFF a light, and to get Temperature and Humidity data and view it on an online dashboard
What is RaspberryPi
RaspberryPi is an open-source, low cost computer on a chip, in other words it is a cheap and small computer. The affordable price, the small size and the powerful hardware make RaspberryPi a perfect core for lots of IoT Projects. You can find more about RaspberryPi here
What is MQTT
MQTT is a machine-to-machine (M2M)/”Internet of Things” connectivity protocol. Further reading can be found here
How we will do it
The idea is to use a Dashboard to control light and to monitor the data received form the Temperature/Humidity sensor. What really happens behind the scenes when we move the button on the dashboard, is that a function will be triggered to send an MQTT message with a specific topic, on the other hand the python code that runs on the RaspberryPi is connected to the same MQTT Broker and subscribed to the same topic, and we have already specified in out code that if we received an MQTT message with “ON” we turn on the light (we send a signal to the relay that is connected to the RaspberryPi) and vice versa.
In the same way, the python script on the RaspberryPi is sending Temperature/Humidity as MQTT messages and the dashboard s connected to the same MQTT Broker and subscribed to the same topic, and after receiving the messages, a function is responsible about converting these messages to a user-friendly gauge.
Further Reading and Resources
MQTT mqtt.org
SSL for secure communication SSL
Eclipse Paho Paho library
Cool IoT Blog IOT BYTES
Python for Beginners Learn Python
Setup
The setup has two parts:
-
On the RaspberryPi
-
On your laptop
On RaspberryPi
- ssh into yor RaspberryPi either from CLI (on MacOS and Linux):
ssh pi@<IP_ADDRESS>
-
or using PUTTY on Windows
-
clone this repo to your
RaspberryPiby running the following command
cd ~
git clone https://github.com/ahasna/mqtt-raspberryPi-workshop.git
- go to the repo you’ve just cloned
cd ~/mqtt-raspberryPi-workshop
- Run the following:
pip3 install paho-mqtt
- edit
run.pyadding values to the following variables:
mqtt_broker, mqtt_broker_port, temp_topic, humidity_topic and light_topic
Note: You’ll have to change the topics to unique ones of your choice to avoid receiving messages from other publishers on the same broker
# VARS
mqtt_broker = "mqtt.eclipse.org"
mqtt_broker_port = "1883"
temp_topic = "some_topic/sub_topic" # example: asem/home/temp
humidity_topic = "some_topic/another_sub_topic" # example: asem/home/humidity
light_topic = "some_topic/also_another_sub_topic" # example: asem/home/light
# sensor/led
led_pin = 14
sensor_pin = 4
- Save changes:
Ctrl + XthenYthen finallyEnter
On your Laptop
- clone this repo to your
local machine (laptop)by running the following command from your CLI
git clone https://github.com/ahasna/mqtt-raspberryPi-workshop.git
-
or just download from Github as a ZIP file if you don’t have
gitinstalled. From here -
go to
mqtt-raspberryPi-workshop/dashboard/js(the repo you’ve just downloaded or cloned) -
edit
app.jsto add theMQTT_BROKER_ADDRESSand make sure that the MQTT topics match those inrun.py(in RaspberryPi)
const mqtt_broker = "iot.eclipse.org";
const temp_topic = "some_topic/sub_topic"; // example: asem/home/temp
const humidity_topic = "some_topic/another_sub_topic"; // example: asem/home/humidity
const light_topic = "some_topic/also_another_sub_topic"; // example: asem/home/light
connect Circuits
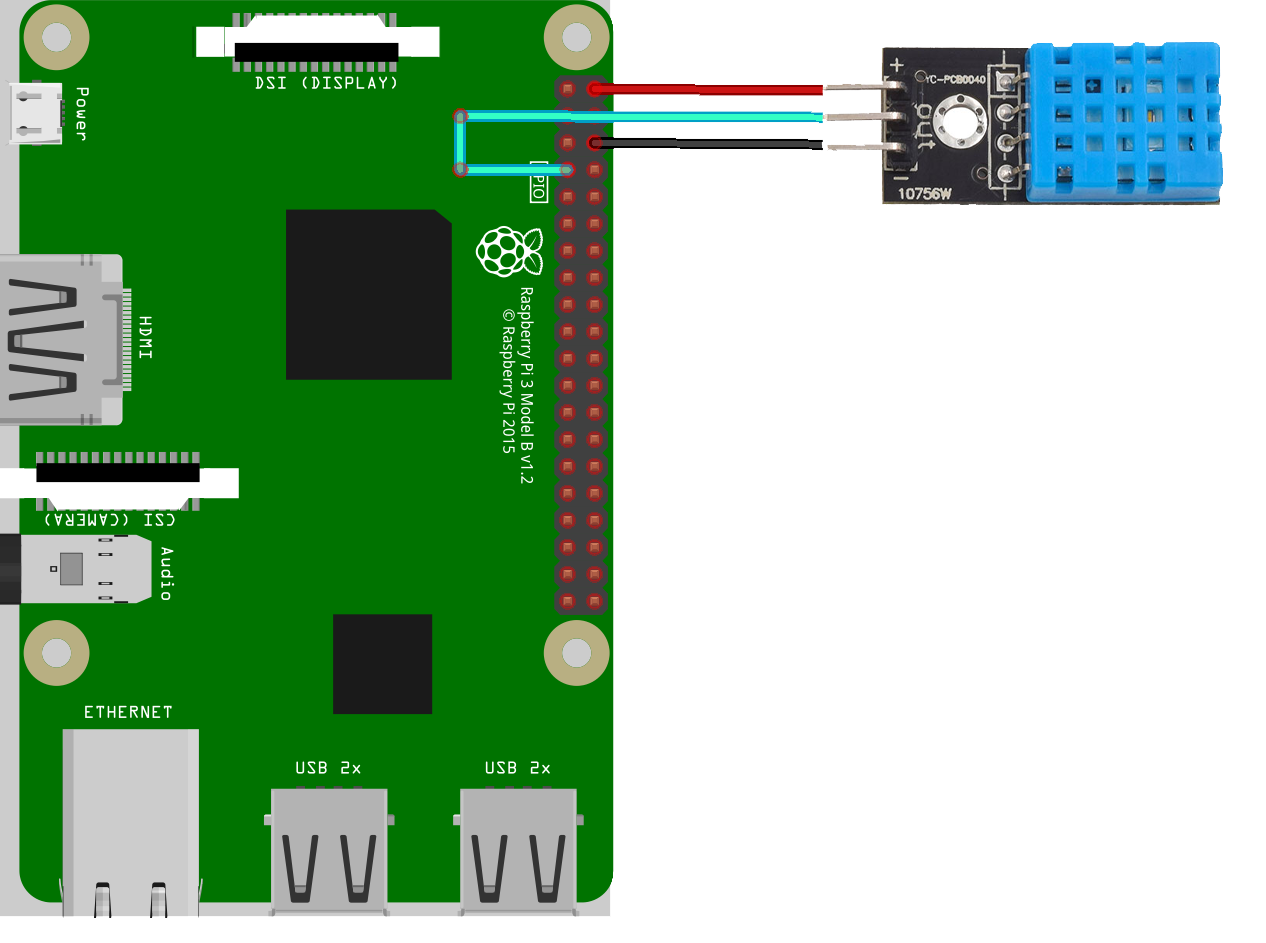
Temp./Humidity sensor (DHT11)
follow the diagram below to connect the sensor to your RaspberryPi

LED
follow the diagram below to connect the LED to your RaspberryPi

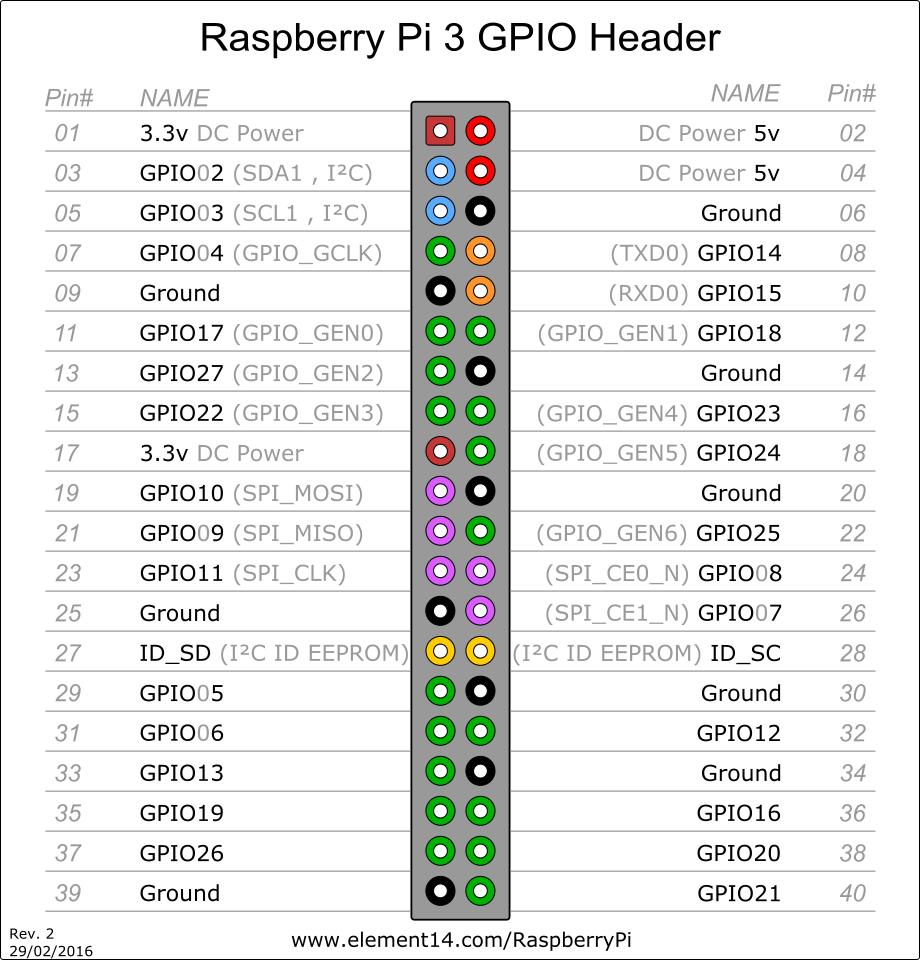
for more details see the GPIO layout for RaspberryPi3 below

Running the Code
RaspberryPi
- ssh into yor RaspberryPi either from CLI by using:
ssh pi@<IP_ADDRESS>
or using PUTTY
- go to the repo you’ve cloned
cd ~/mqtt-raspberryPi-workshop/code/htsensor
python3 run.py
- Run the following:
pip3 install paho-mqtt
Dashboard
- go to
mqtt-raspberryPi-workshop/dashboard/ - open
index.htmlin browser
Expected results
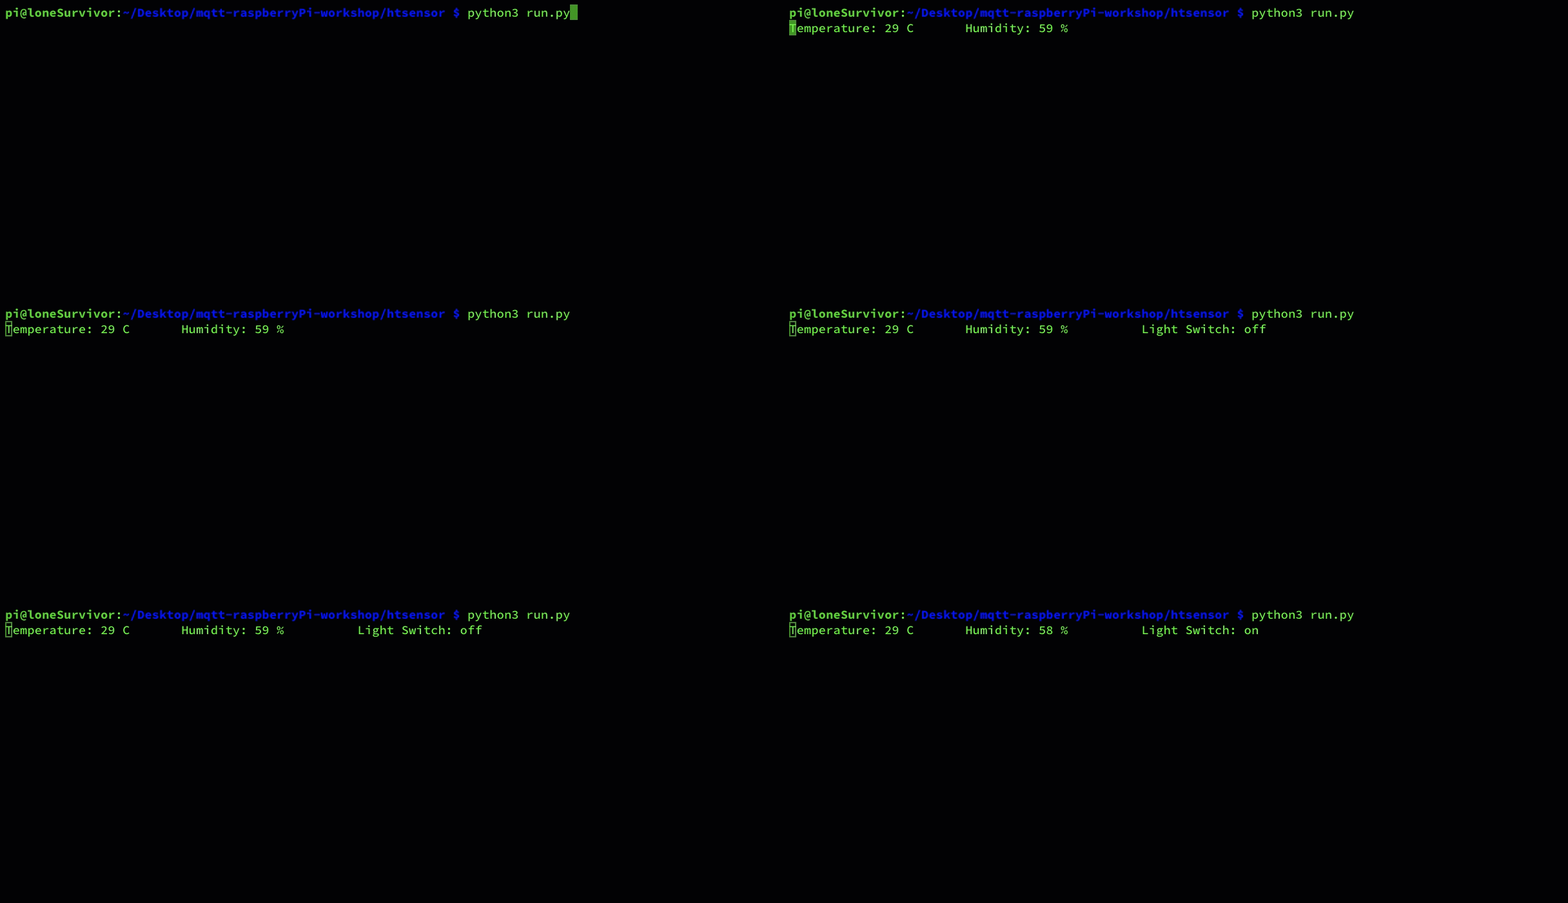
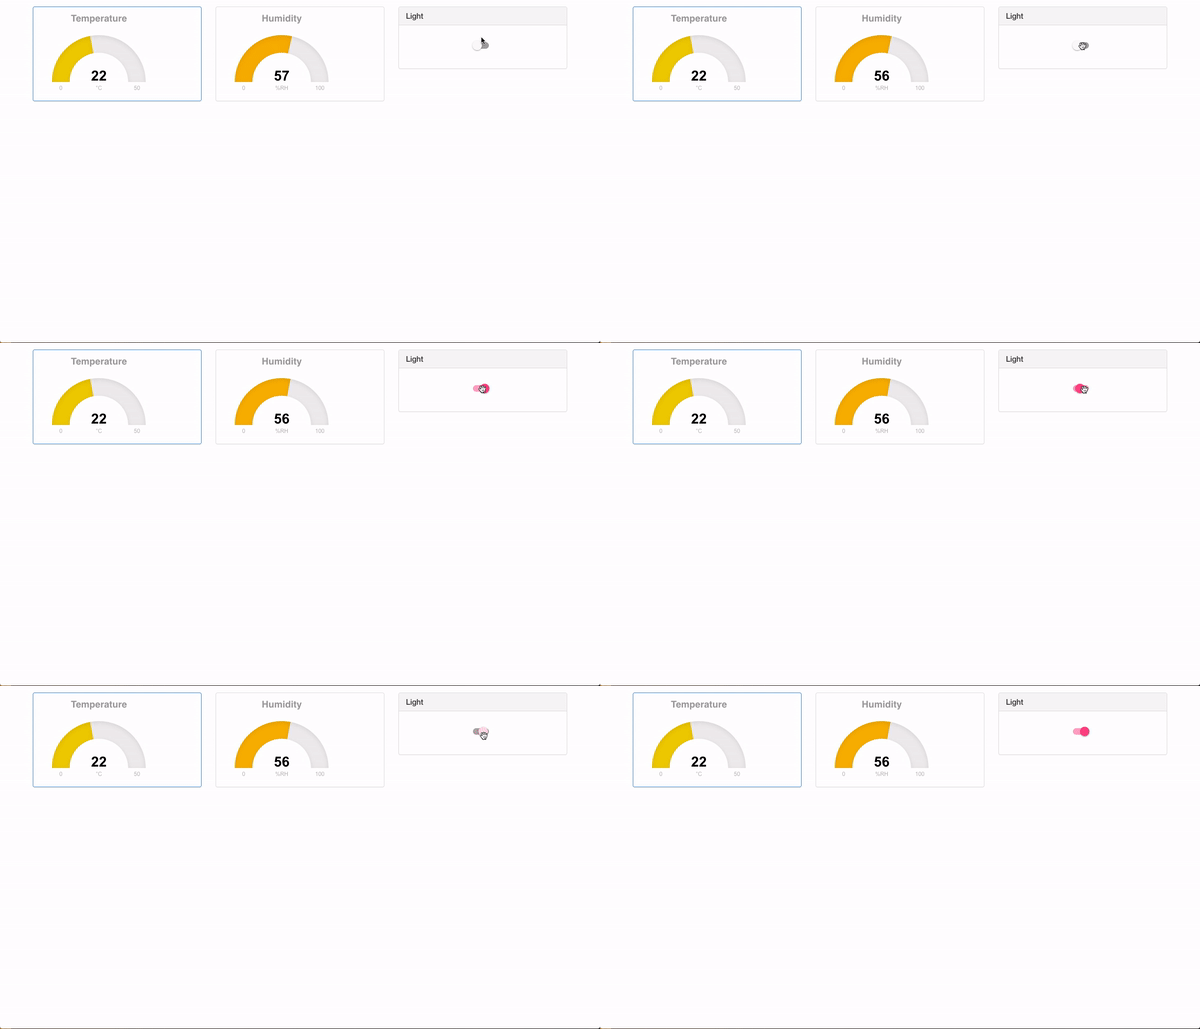
if everything runs as expected you should see the following:
RaspberryPi CLI

Browser

Is all of this too easy for you?
if what we have been doing so far is not challenging enough for you, try controlling the LED using the Temp./Humidity values and add an indication alert of that to the dashboard